Data Upload
Upload lists of data into the platform for use in campaigns, segments and reporting
You can access the Data Upload wizard from the Customers area of the platform.
Step 1
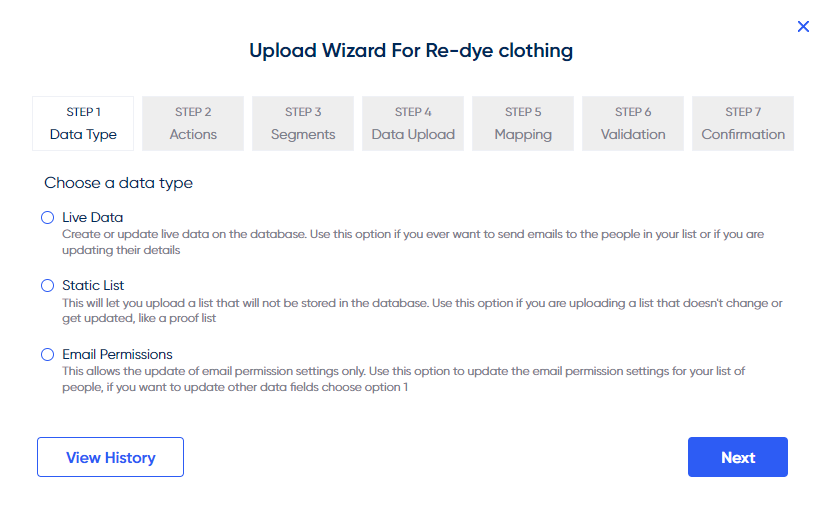
To upload a list into the database, select Live Data. You can upload a Static List for lists that don't update, such as a proof list.
Step 2
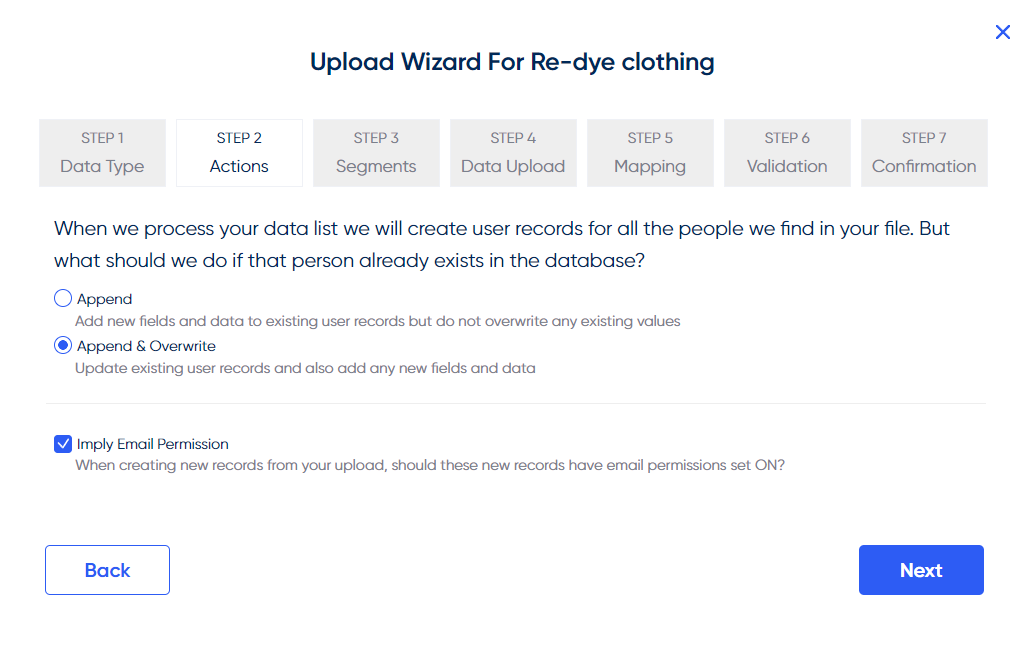
If Imply Email Permission is ticked on the Actions tab, then anybody with a null/blank email permit value (someone that doesn’t already exist in the database) will be opted in and given an email permit value of Y.
Note:If unticked, anyone with a null/blank email permit value will upload as Null in the database (they will not be given email permit). This toggle will not affect/change any permits that are already Y or N, only blank/null values.
Alternatively, if you’re confident that all records in the list are to be given email permit, then you can add an extra column to your data file – headed with ‘emailpermit’ and a value of ‘Y’ against all records.
Step 3
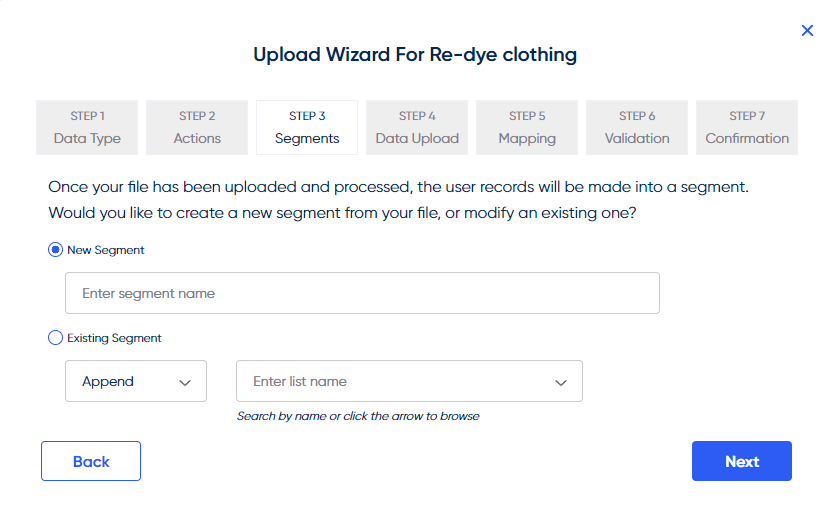
This next screen will require a name to be inputted into the ‘New Segment’ field. This will be the name of the list once it’s been uploaded. Alternatively, you can choose to Append or Replace an existing list load by checking the second option and finding the list name in the autofill drop down.
Step 4
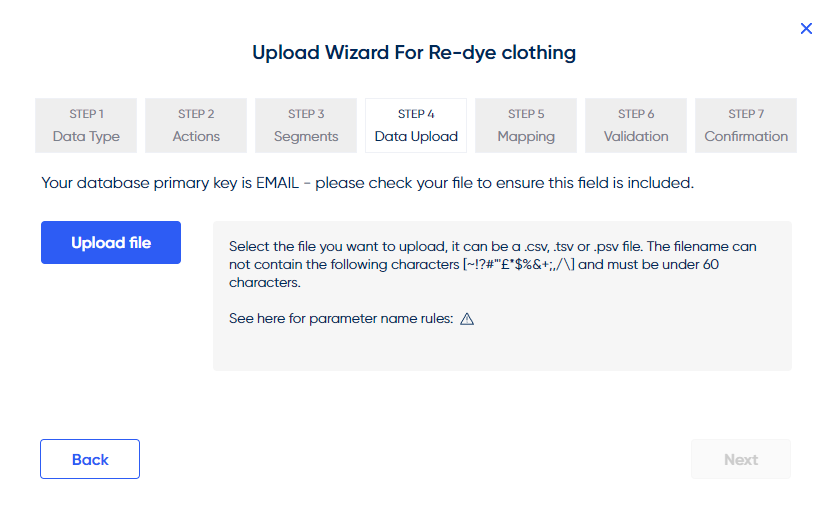
Select a saved .csv, .psv or .tsv file by clicking the Upload file button. As a bare minimum, it must contain a column of email addresses headed with ‘Email’.
Step 5
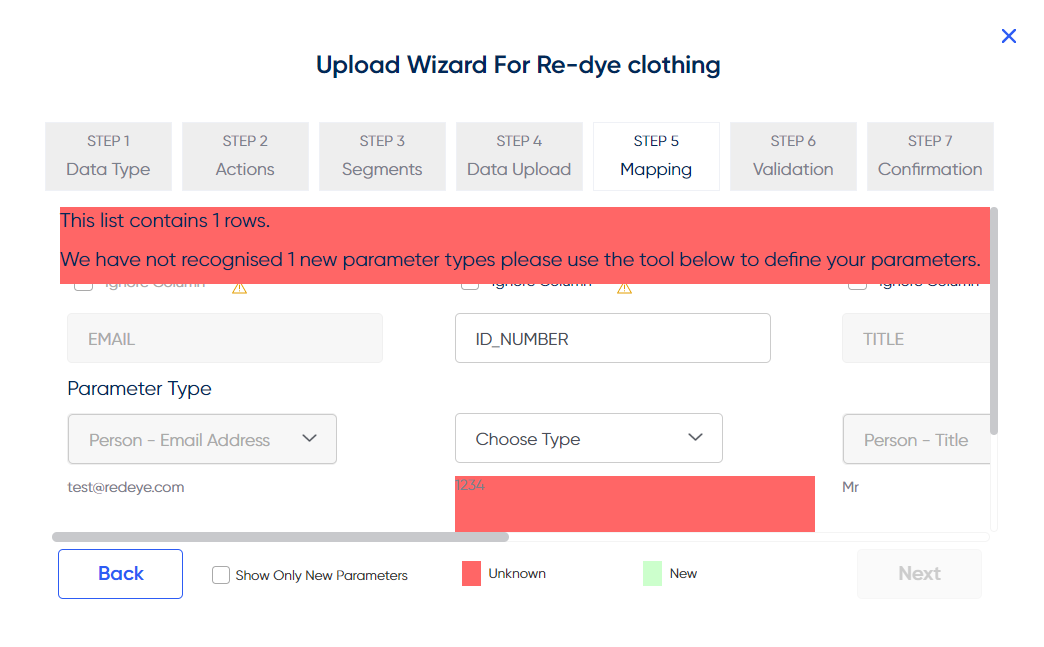
The following screen will display a preview of the columns/parameters from the data list. If they are white then they are already defined in the system and if they are red they will either need amending to an existing parameter or defined as new.
This can be done by typing a new parameter name in the column field and/or using the drop down to choose a parameter type.
Step 6
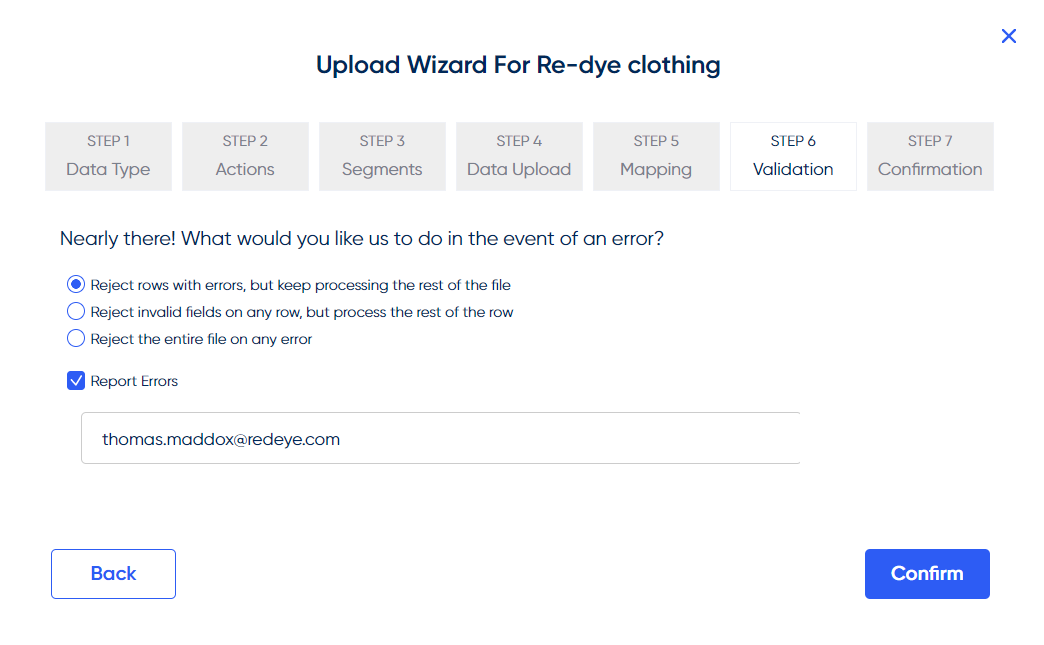
The next set of options will determine what will happen in the event on an error.
Step 7
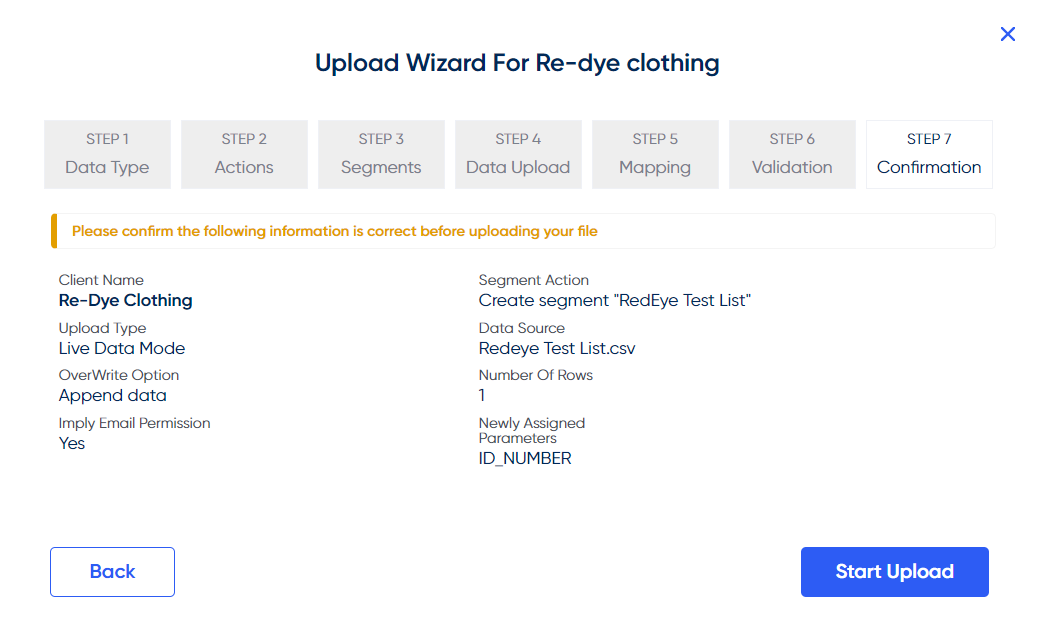
The final screen will display a breakdown of all elements to review before committing to the data list upload.
Updated 10 months ago